lördag 10 november 2012

Running EPiServer on Windows Azure

Not long ago Microsoft released their IaaS on Windows Azure, making it possible to run Virtual Machines in the cloud. One of the biggest problems with running EPiServer on Azure has been the license model being bound to either MAC or IP address. Neither of these parameters have been possible to maintain persistent. Until now. :) With the introduction of Virtual Networks in Windows Azure we are now able to specify the internal IP addresses making it possible to run EPiServer on Azure without any license errors. This blog post shows you how to get EPiServer up and running in the cloud in no time!

First of all, go and get a free Windows Azure trial here https://www.windowsazure.com/en-us/pricing/free-trial/. Just sign in with your Microsoft account, add some more details and your done! Then navigate to the Portal. The first thing you should do is to create the Virtual Network. This is done by navigating to the Networks section and clicking the "New" button and the bottom left corner.


Choose Networks > Virtual Network > Custom Create. This will open a three step wizard.

Step 1: Name your VNET and choose to create a new affinity group. Name that group as well.

Step 2: Enter address space and subnets. For simplicity you can use the same as I've entered in the screenshot above.

Step 3: DNS server. You can just leave this one empty and Windows Azure will fix it for you.

Click the Complete button and the Virtual Network will be created! Simple as that.

Now we should create a storage to put the virtual machine in. Click the New button again and navigate to Data Services > Storage > Quick create.

Enter a URL of your own choice and pick the previously created affinity group.

Click the Create Storage Account button and you're done! Now we should create the actual Virtual Machine and put in into the storage. Navigate to New > Compute > Virtual Machine > From Gallery.

 Step 1: Pick the operating system of your choice (Windows Server 2012 of course).

Step 2: Enter some basic configuration.

Step 3: Enter a DNS name and select your storage account and VNET. Also make sure you're creating a standalone VM.

Step 4: Select your frontend subnet and click Create.

The new Virtual machine is now created! You can click the Connect button at the bottom to access the VM using Remote desktop.

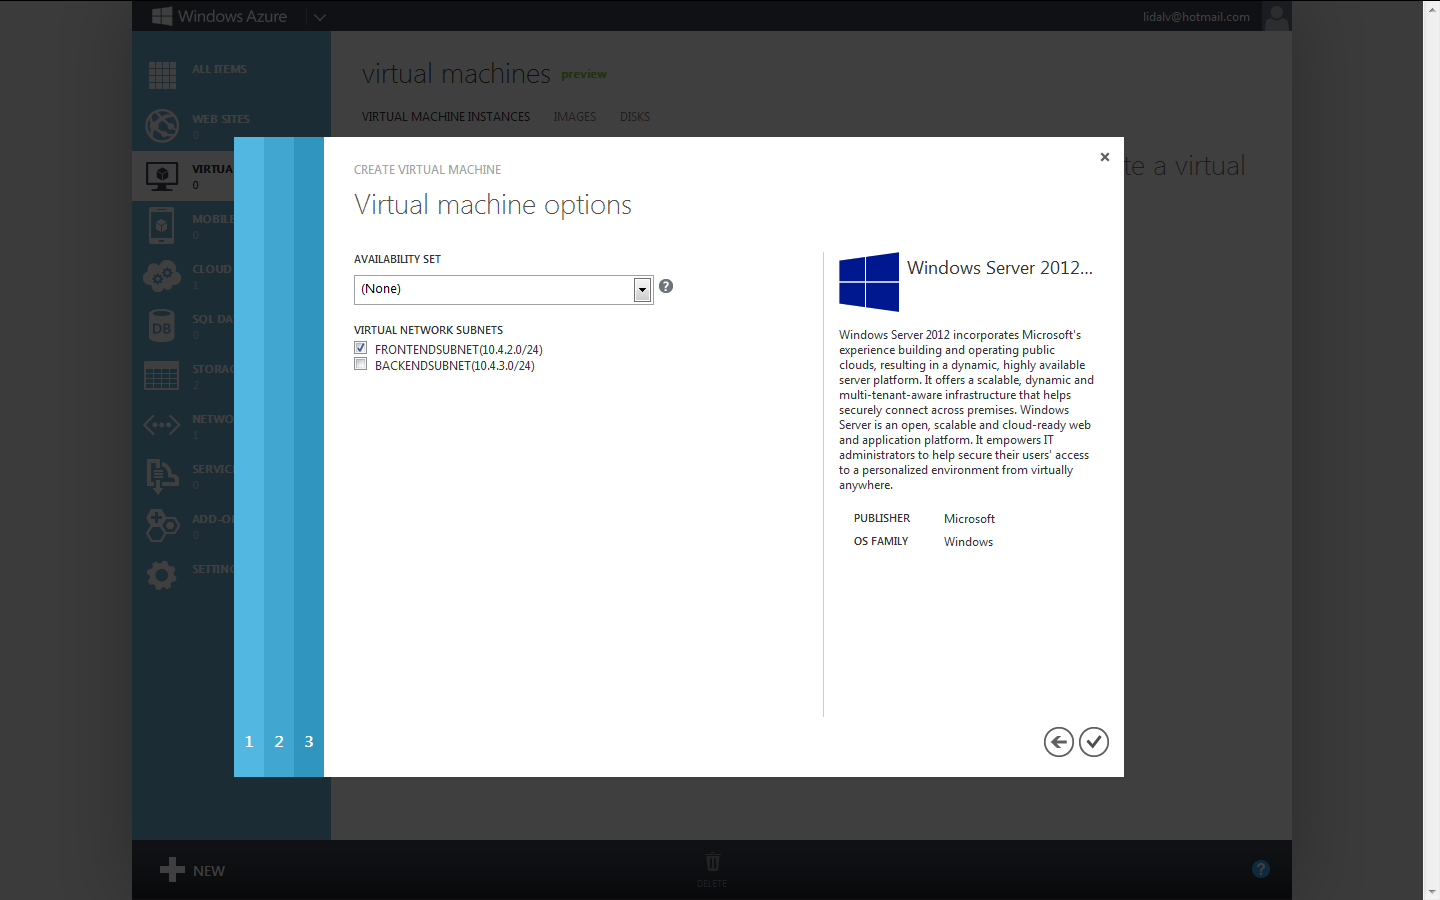
And this is actually pretty much it! From now it's just an ordinary server installation. In my case I had to install the Web Server (IIS) Role, install MVC 4 and of course EPiServer CMS 7.

Run ipconfig /all and note the internal IP to get the correct license from EPiServer...

 ...and we're done! :)

After a restart you can notice that the internal IP is still the same...

...and that the site is still running.

I think that this is really cool! We're now able to easily and really fast get a development/test/staging environment up and running without having to think about aspects of hardware at all. Instead of choosing a default VM from Microsoft it is possible to upload and use an image of your own, making it really fast to set up new development environments for new projects or project members.

fredag 2 november 2012

EPiServer cache invalidation over net.tcp

I was recently struggling to get cache invalidation to work in EPiServer over net.tcp instead of UDP, which is default in EPiServer. There are a couple of good blog posts out there (for example http://blog.fredrikhaglund.se/blog/2009/09/22/episerver-cms-how-to-configure-remote-events-with-many-servers-and-firewalls-between-them/), and this post aims to clarify some aspects. I'm using EPiServer CMS 6 R2 on Windows Server 2008 R2 / IIS 7.5

First of all I want to configure the use of port sharing. This config should be applyed to all three web.configs:
<!-- In all three web.configs  -->
<system.serviceModel>   
    <bindings>
      <netTcpBinding>
        <binding name="RemoteEventsBinding"
                 portSharingEnabled="true">
          <security mode="None" />
        </binding>
      </netTcpBinding>
    </bindings>

Then I want to configure the site used by the editors ie. the site that should publish events of updates to the other server:

<!-- web.config of the publisher site  -->
<system.serviceModel>
    <client>
      <endpoint name="WEBFRONT1"
                contract="EPiServer.Events.ServiceModel.IEventReplication"
                bindingConfiguration="RemoteEventsBinding"
                address="net.tcp://[SERVER1]/RemoteEventService1"
                binding="netTcpBinding" />

      <endpoint name="WEBFRONT2"
                contract="EPiServer.Events.ServiceModel.IEventReplication"
                bindingConfiguration="RemoteEventsBinding"
                address="net.tcp://[SERVER2]/RemoteEventService2"
                binding="netTcpBinding" />
    </client> 

The other two servers do not need any client configuration for the cache invalidation to work. They however needs some endpoints:
<!-- web.config of WEBFRONT1 (subscriber)  -->
<services>
      <service name="[EPiServerSiteIdWebFront1]/EPiServer.Events.Remote.EventReplication"
               behaviorConfiguration="DebugServiceBehaviour">
        <endpoint name="RemoteEventServiceEndPoint"
                  contract="EPiServer.Events.ServiceModel.IEventReplication"
                  bindingConfiguration="RemoteEventsBinding"
                  address="net.tcp://localhost/RemoteEventService1"
                  binding="netTcpBinding" />
      </service>

and:
<!-- web.config of WEBFRONT2 (subscriber)  -->
<services>
      <service name="[EPiServerSiteIdWebFront2]/EPiServer.Events.Remote.EventReplication"
               behaviorConfiguration="DebugServiceBehaviour">
        <endpoint name="RemoteEventServiceEndPoint"
                  contract="EPiServer.Events.ServiceModel.IEventReplication"
                  bindingConfiguration="RemoteEventsBinding"
                  address="net.tcp://localhost/RemoteEventService2"
                  binding="netTcpBinding" />
      </service>

[UPDATE: THIS IIS SECTION IS NOT NEEDED!]
And that's the only web.config needed! You do need to set two settings in the IIS of the to subscriber sites:
Site > Bindings...


Right-click the site in IIS > Manage Web Site > Advanced Settings...


[END UPDATE]